To see this feature in action, log in to the Desklog app.
Step 1: From the Admin left panel, click on Projects.
Step 2: From the drop-down, click on Project List.
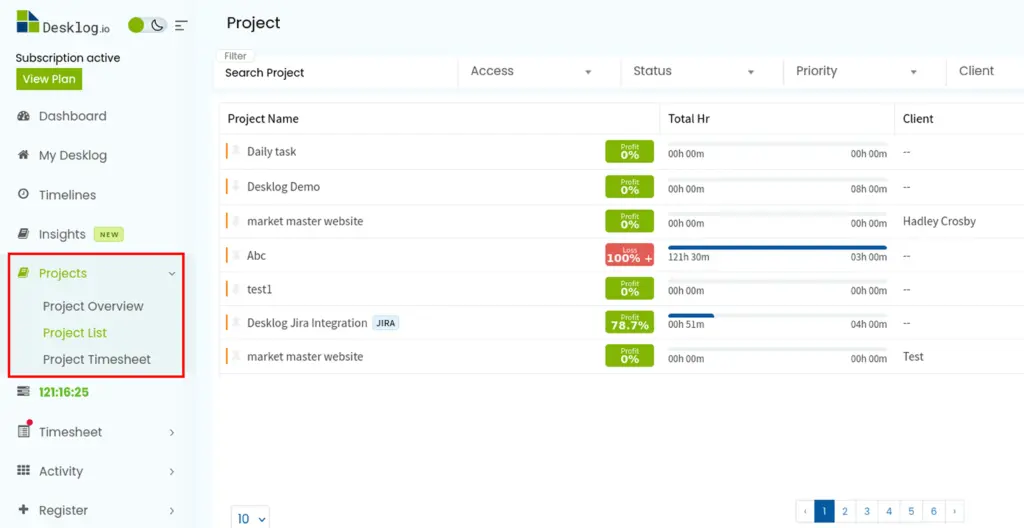
Step 3: From the list of Projects, click on the project containing the task you wish to assign start/end date to.

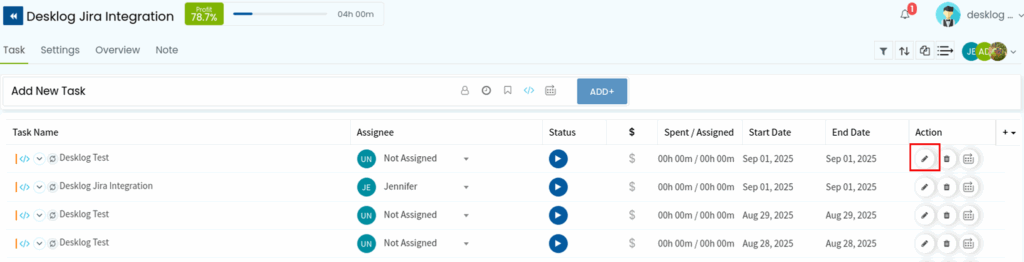
Step 3: Locate the task you wish to assign dates to from the list and click on the Edit icon under the Action header.
Step 4: The Task Info page will appear. Click on the Advanced Options.
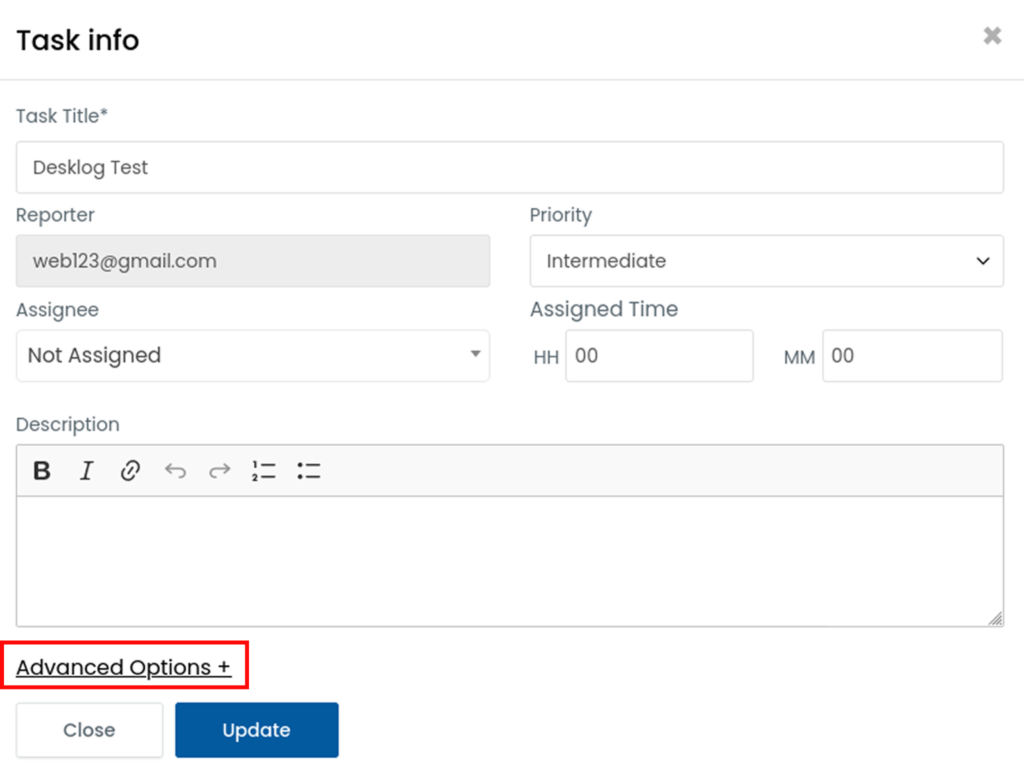
Step 5: You will see the option to add dates to the task. Select your preferred dates and click the update button.
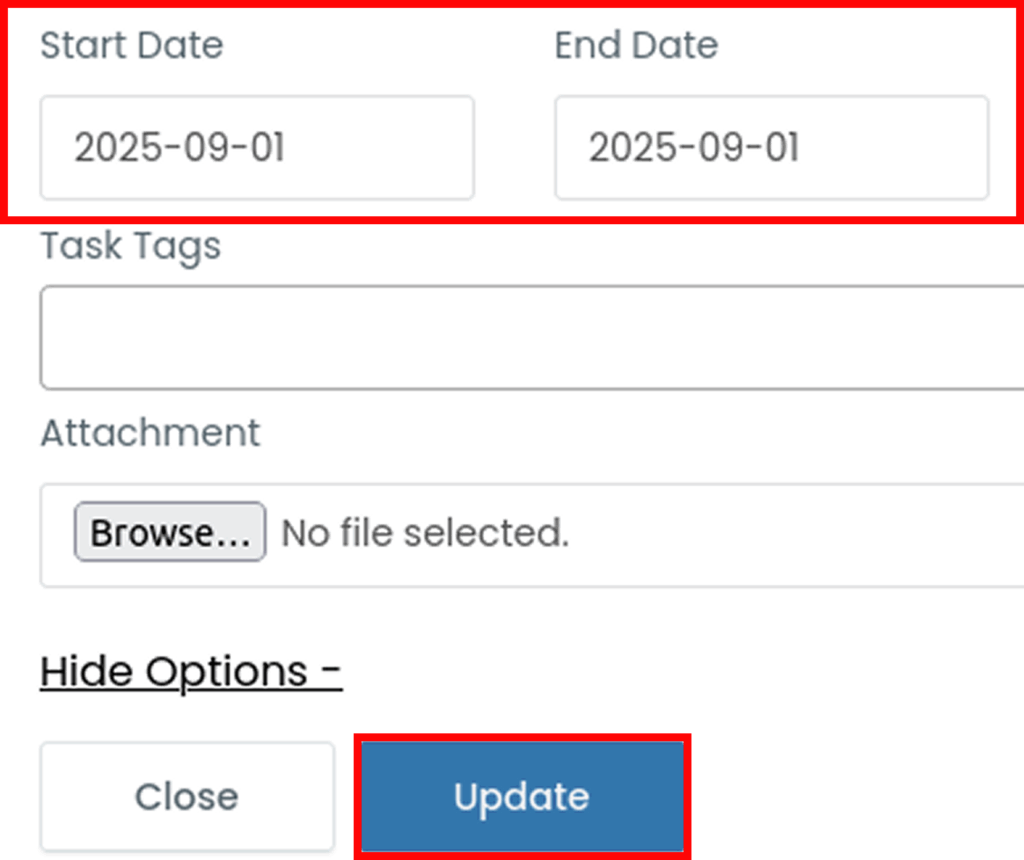
The task date will be updated successfully.