Here’s the step by step guide on how to integrate Jira with Desklog.
API Token Generation
First you have to create an API Token from Jira. For that,
Step 1:
Go to Jira Website and login with your credentials
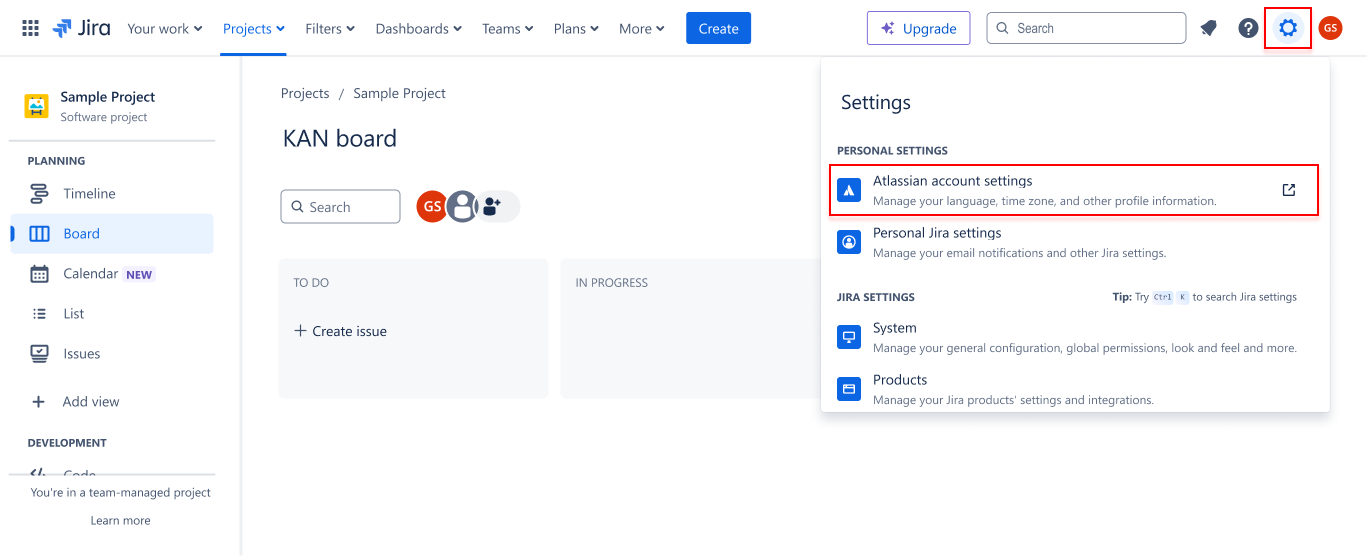
Step 2:
Once you’re logged in, click on the Settings Icon located in the top-right corner of the screen and Click on Atlassian Account Settings
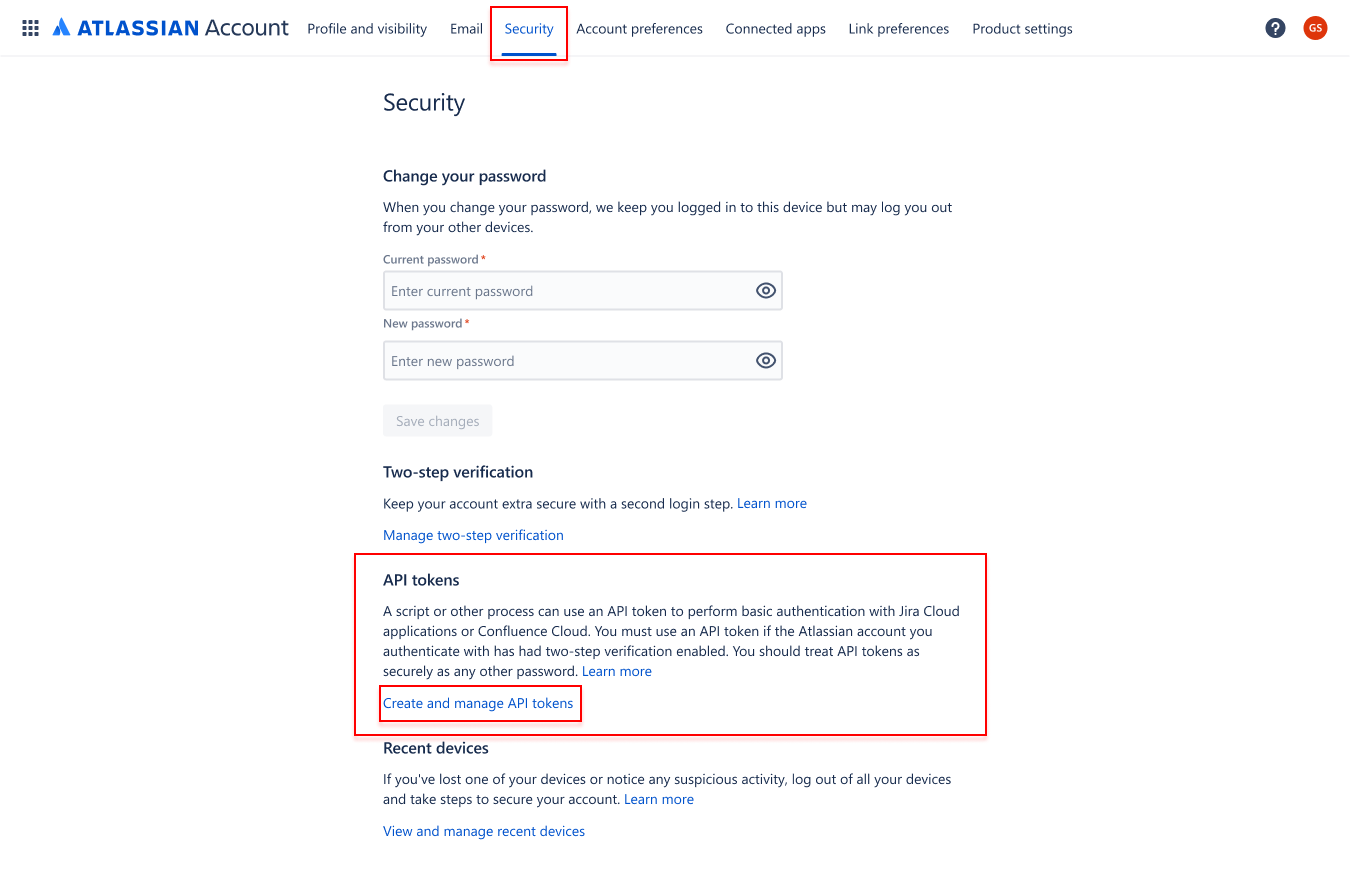
Step 3:
Navigate to the Security section then find the section API Token. Then click on Create and Manage API Token.
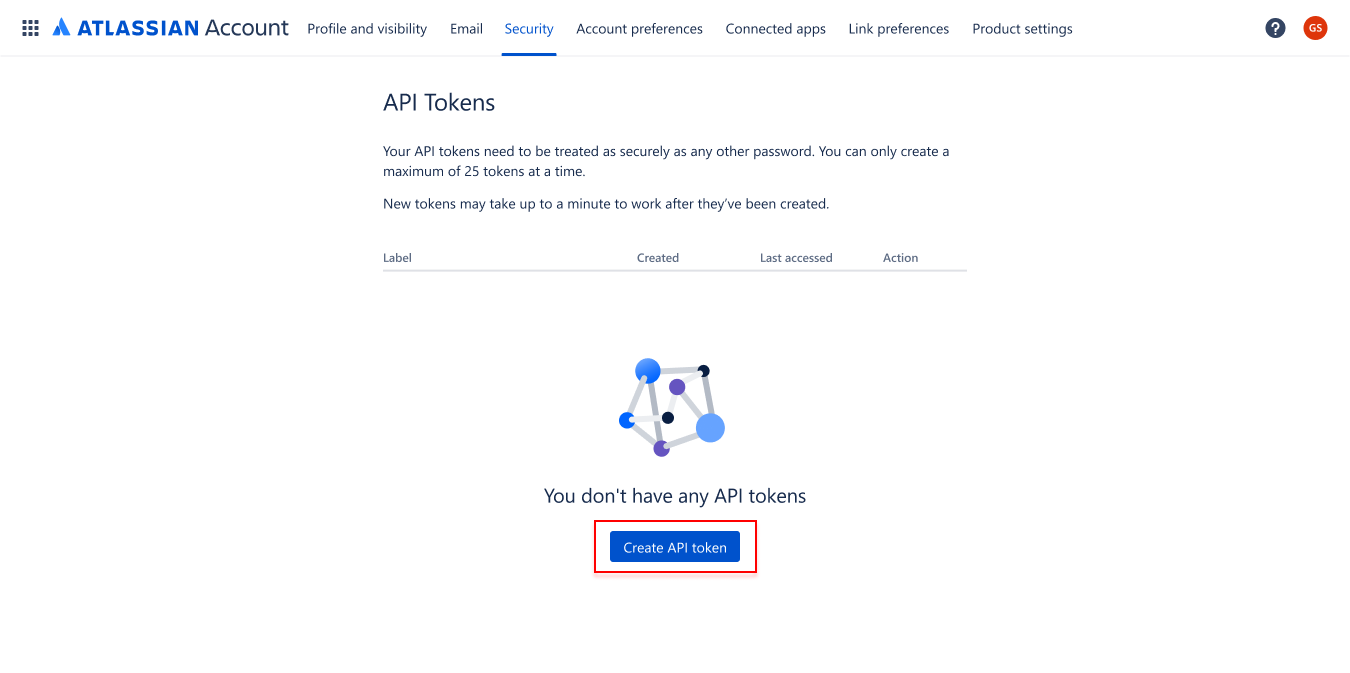
Step 4:
Click on the Create API Token
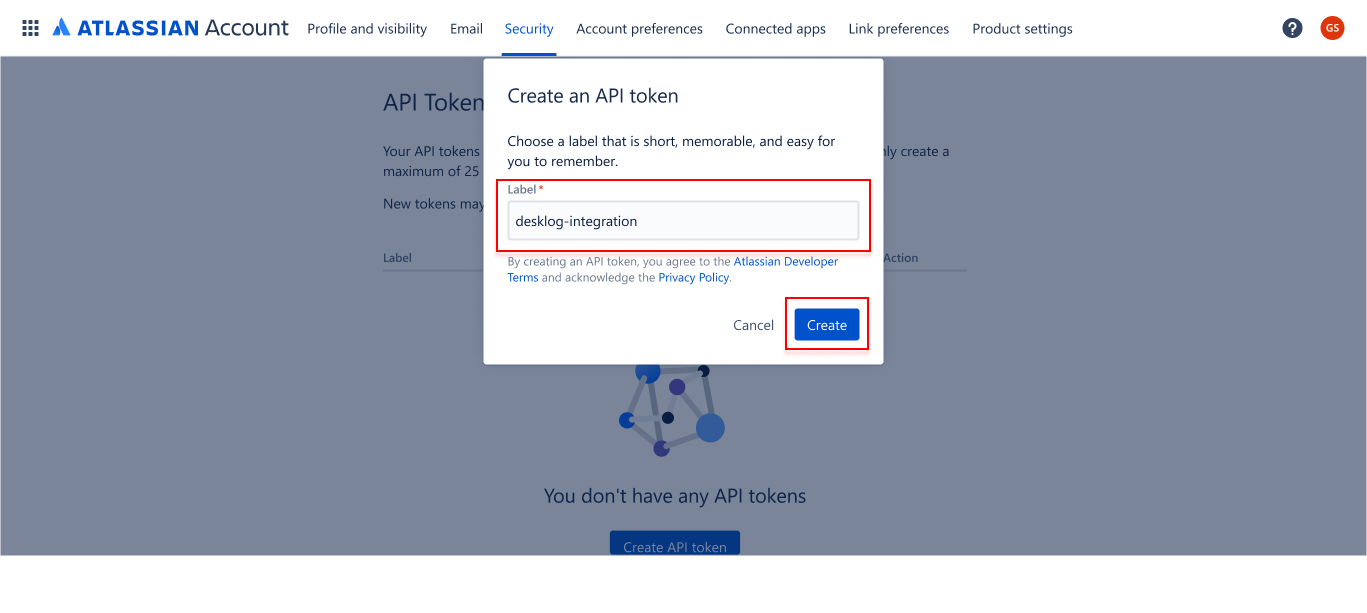
Step 5:
Enter the Label to identify your API Token, then click Create
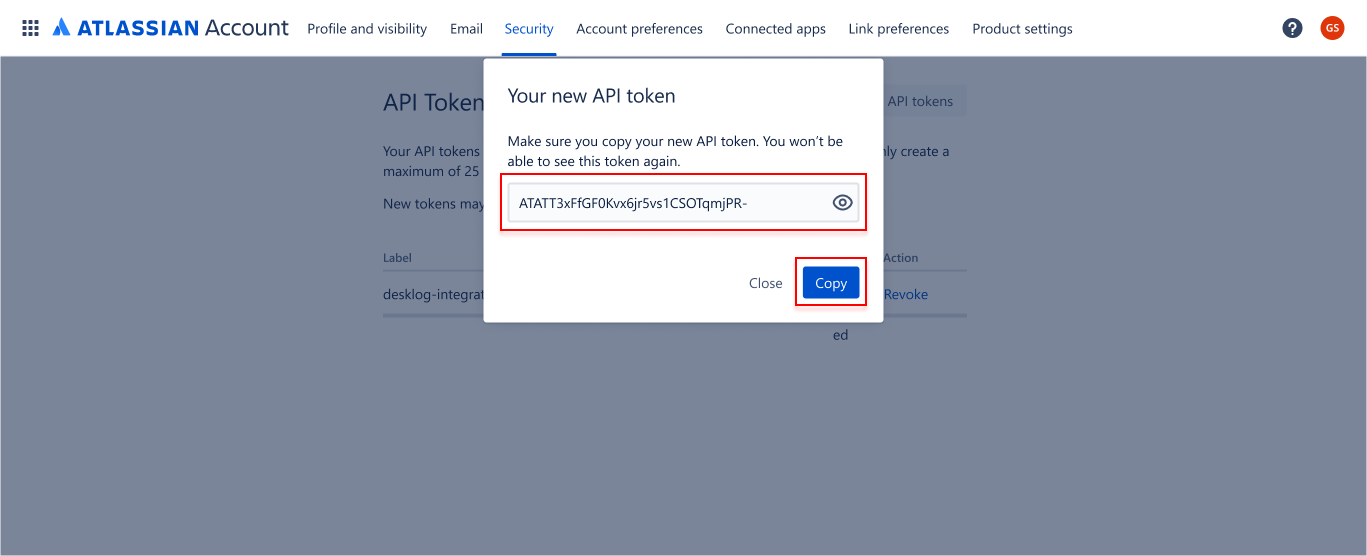
Step 6:
API token will appear on the screen. Be sure to copy it and save it in a secure location.
Create the Access Token from Desklog
Now, you will have to create an Access Token from Desklog, in order to integrate Desklog with Jira.
Step 1:
Go to Desklog and login to your account.
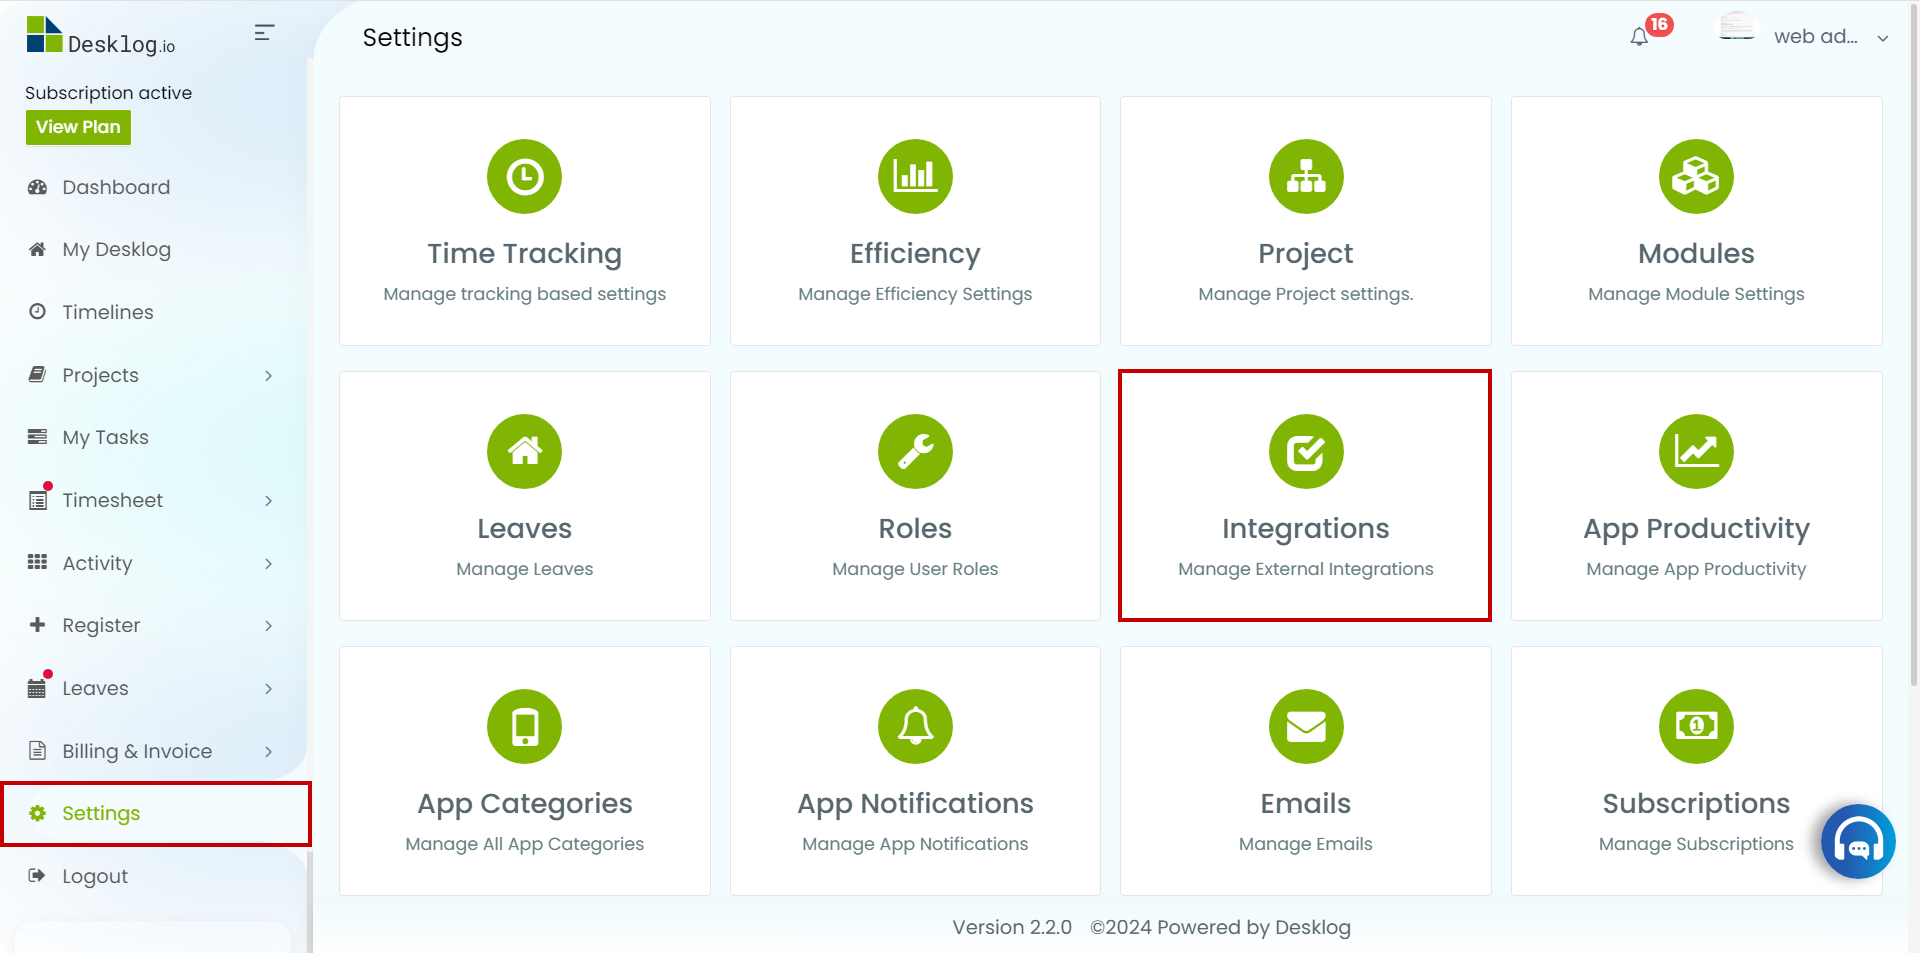
Step 2:
Navigate to the Settings from the dashboard. And Open Integrations.
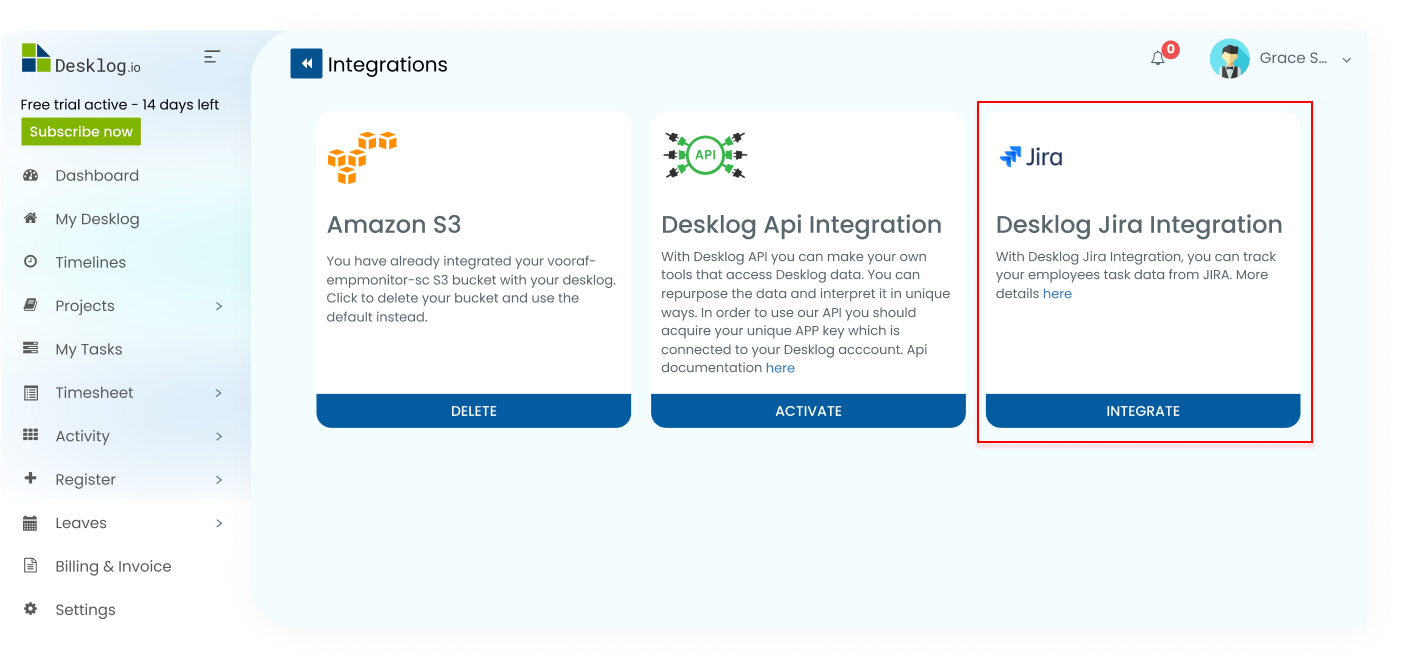
Step 3:
In the integrations section, find and click on the Jira integration option.
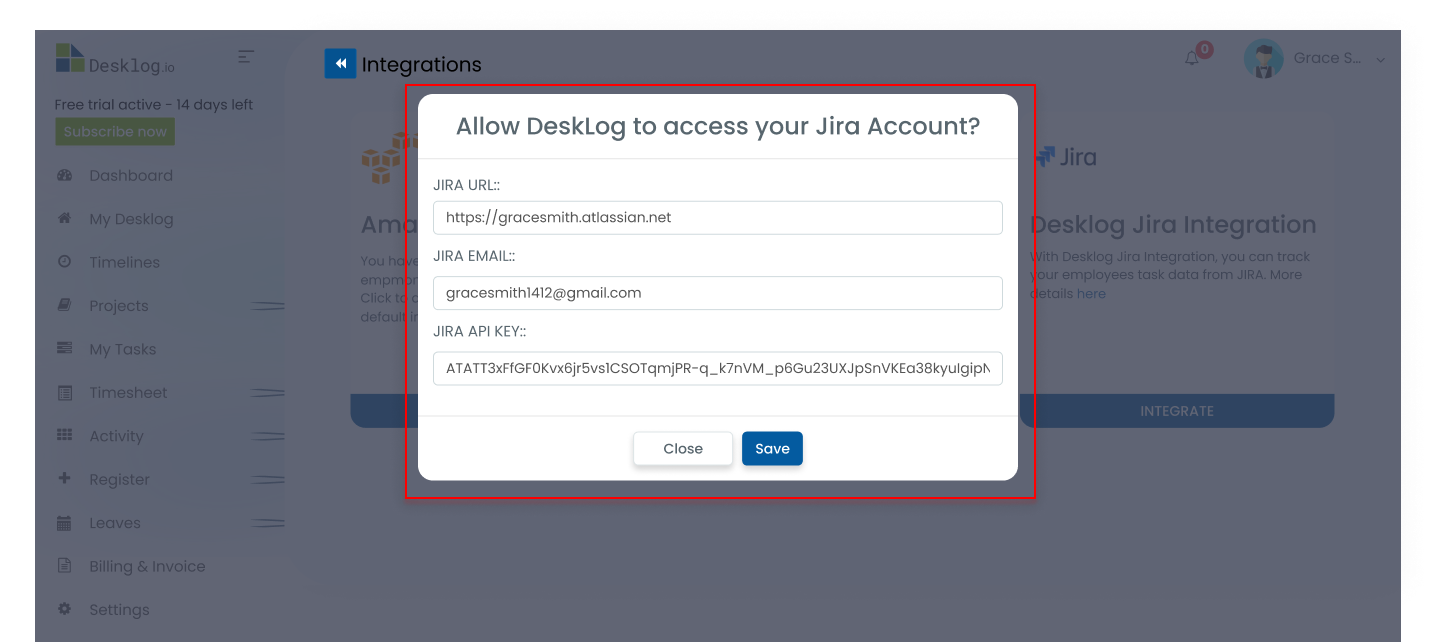
Step 4:
A pop-up will appear for you to enter the required details. Ensure you only input the instance URL, such as “https://example.atlassian.net”, without a trailing backslash. Paste the copied API Key here. Click on Save.
Step 5:
After submitting the details, you will receive an access Key from Desklog. Click on Show Access Key.
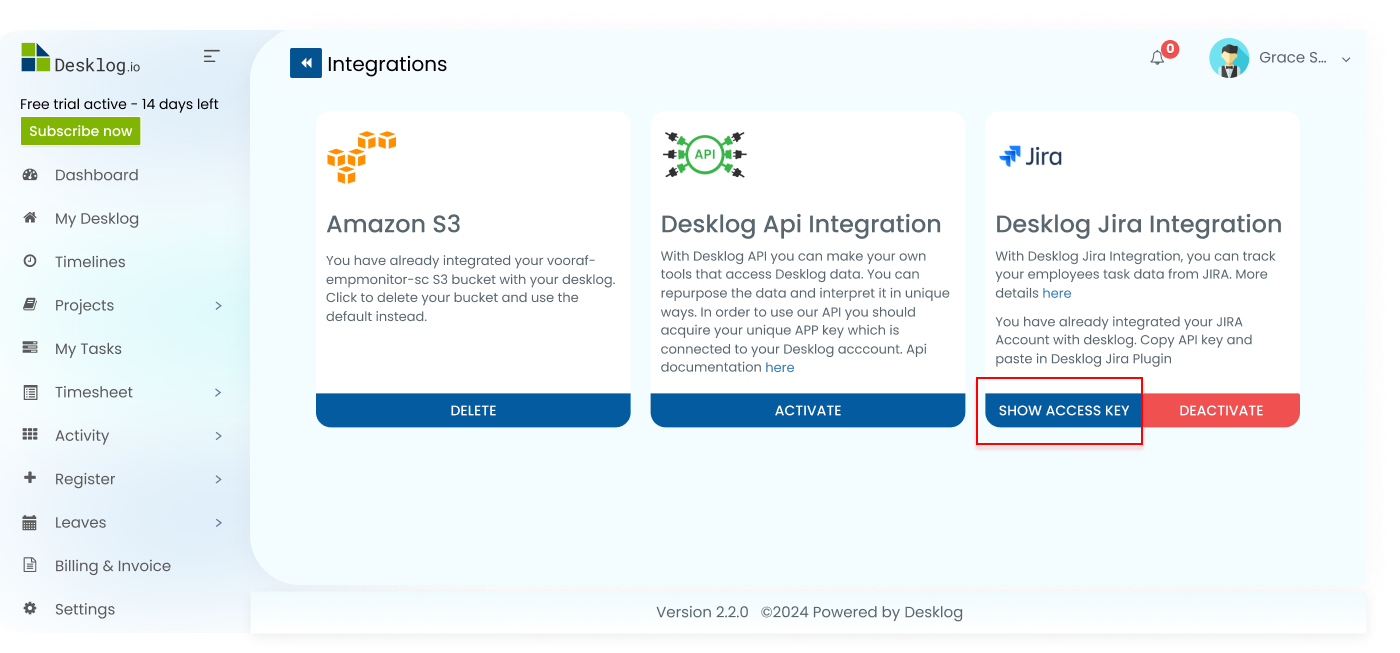
Step 6:
Copy the Desklog Access Key for future use.

How to Set Up Desklog in Jira?
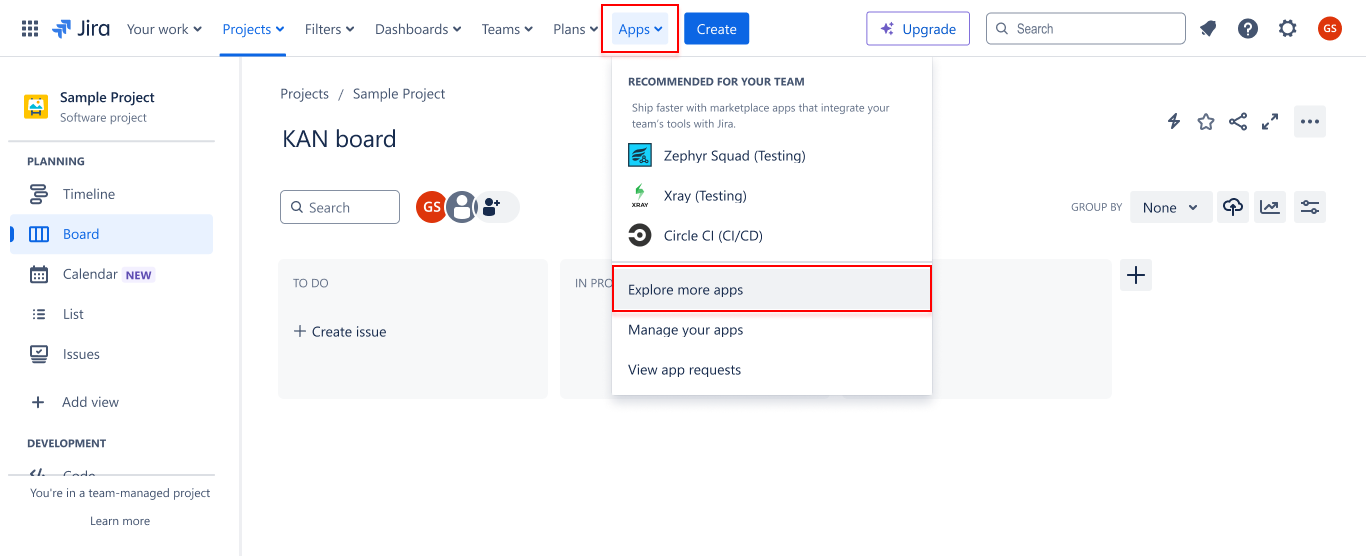
Step 1:
Go to the Jira dashboard and click on the Apps Tab located in the top section. And select Explore More Apps.
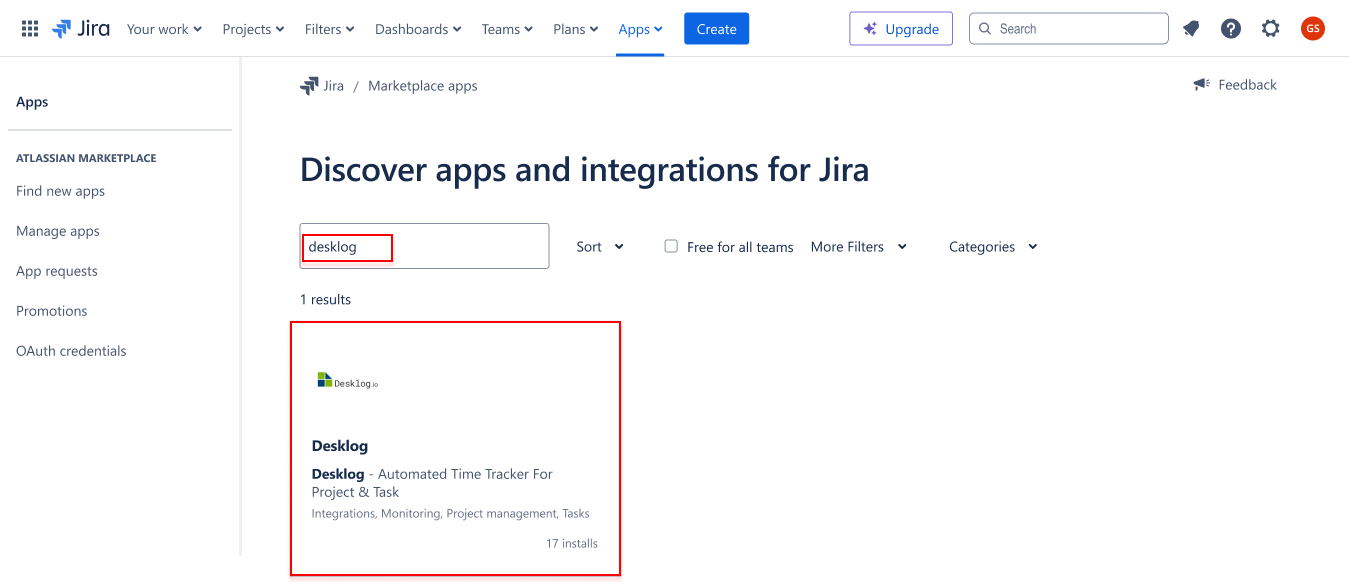
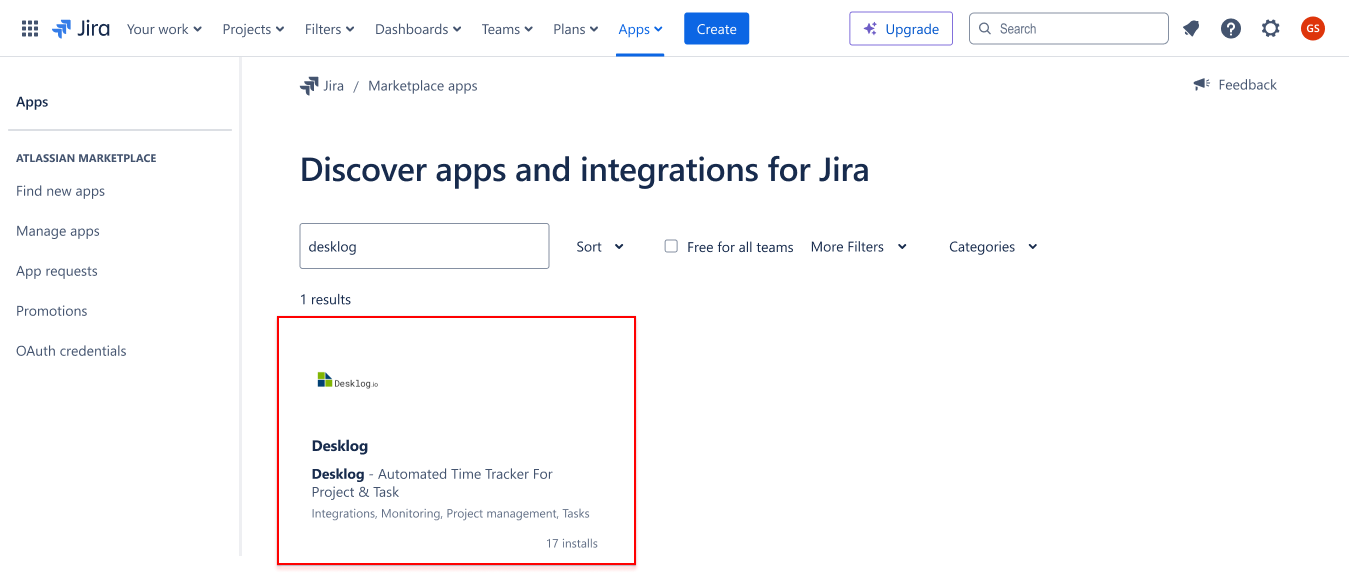
Step 2:
Jira apps & integrations will be displayed here and Search Desklog in the space provided. And Click on Desklog
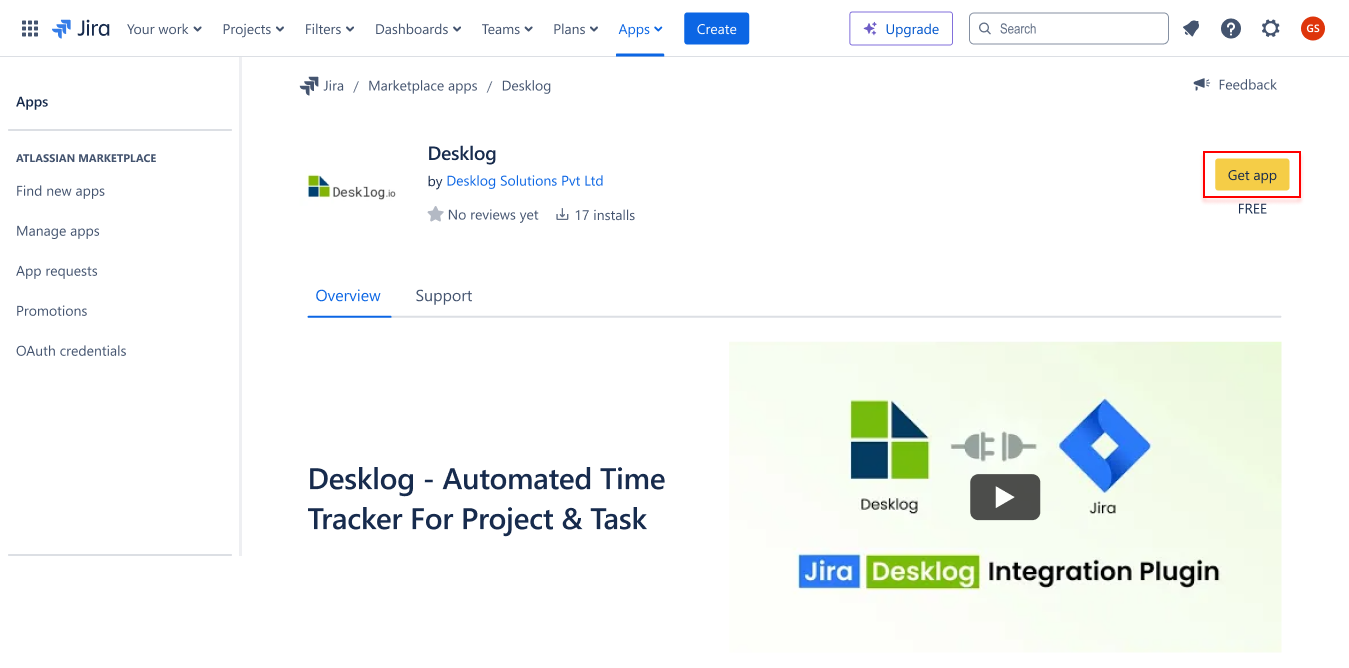
Step 3:
Click on the Get App button to initiate the installation process.
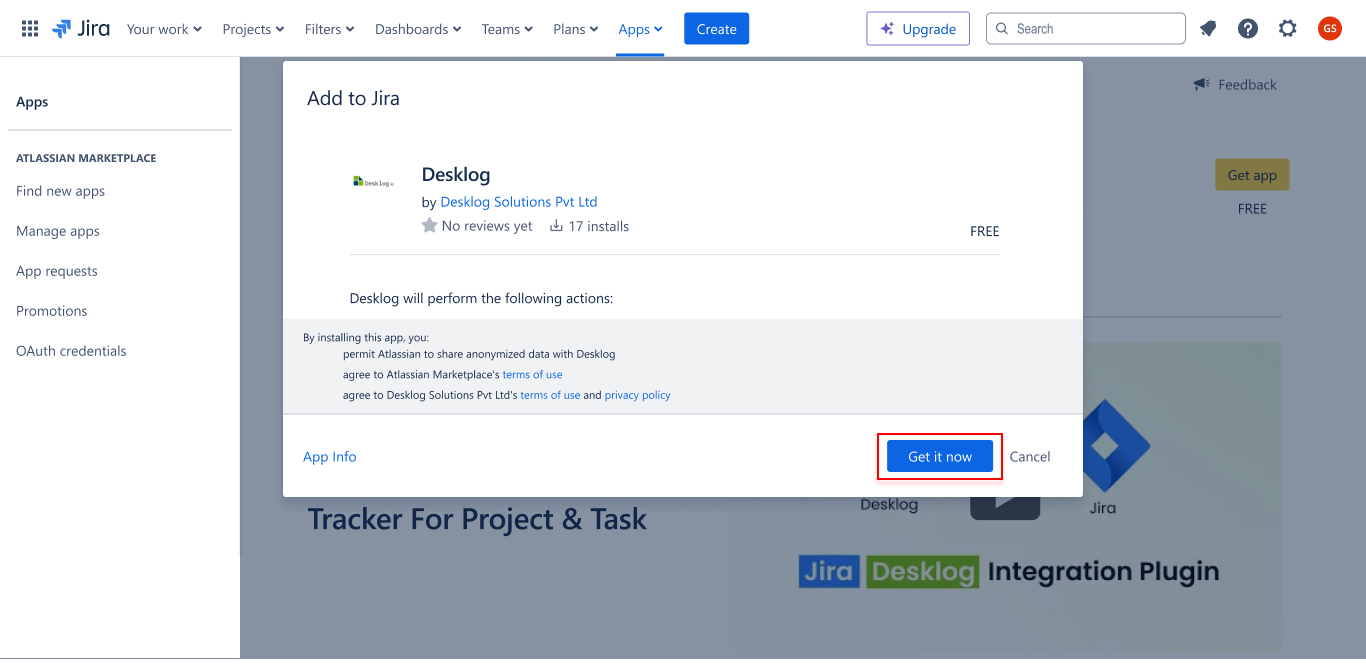
Step 4:
Desklog App will be displayed here and Click on Get It Now.
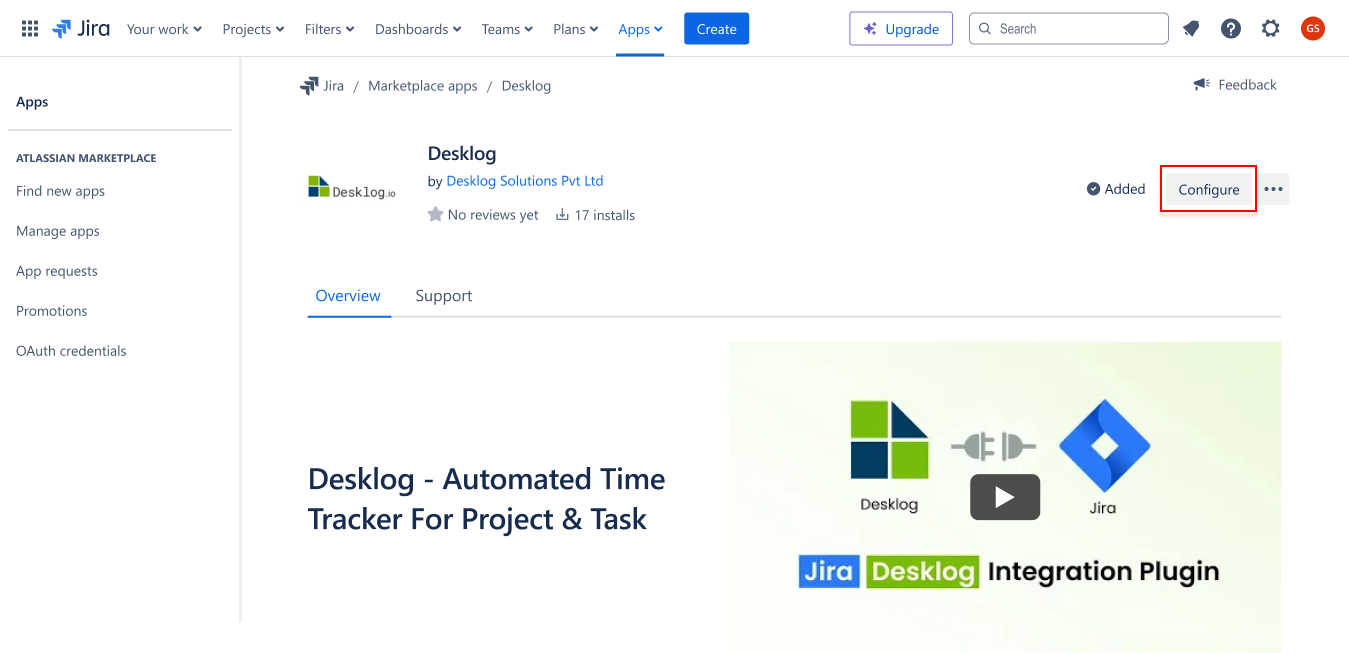
Step 5:
After installation, Click On the Configure button located on the right side of the Desklog app.
Step 6:
Paste the Desklog Access Key acquired from Desklog into the provided field.

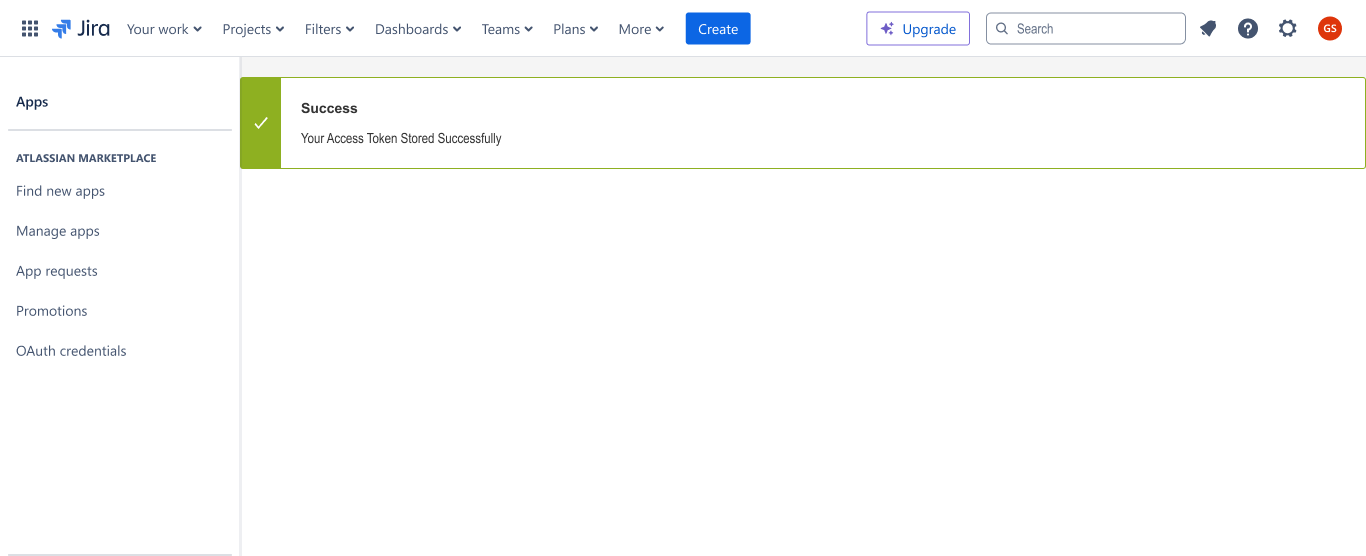
Step 7:
Your Access Token have been stored successfully
Access Desklog App in Jira Instance:
Step 1:
Once the access token is inputted, verify that everything works correctly.
Step 2:
Click On the Desklog App from the Jira instance.
Step 3:
If everything is set up correctly, it will display a list of Jira users in your instance, if they exist.
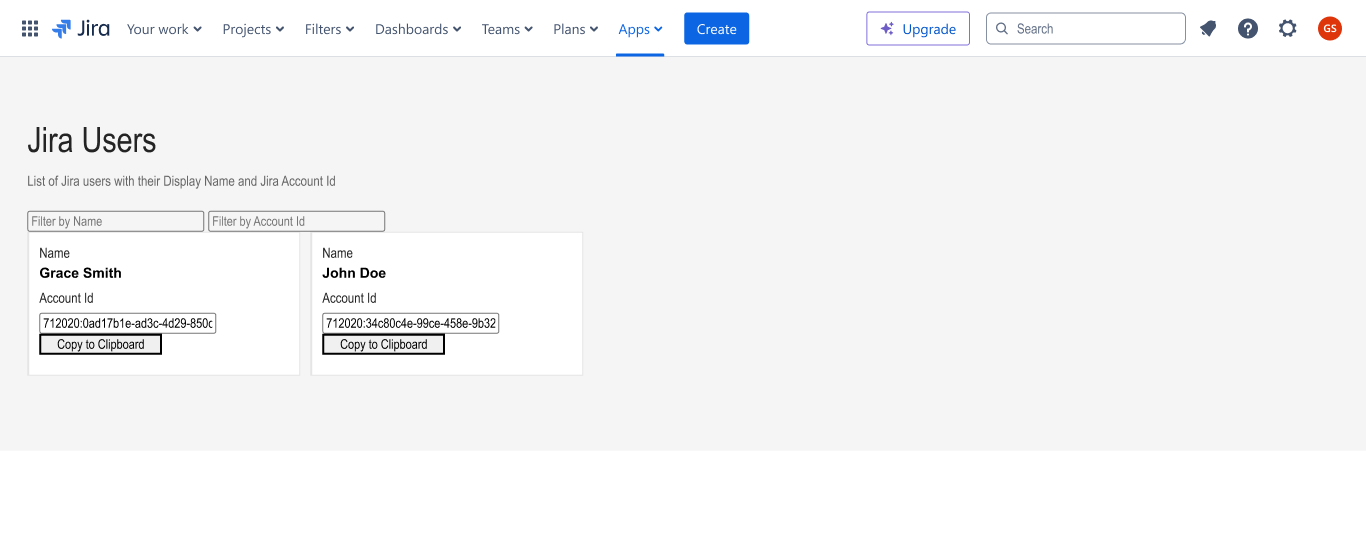
Desklog User Integration
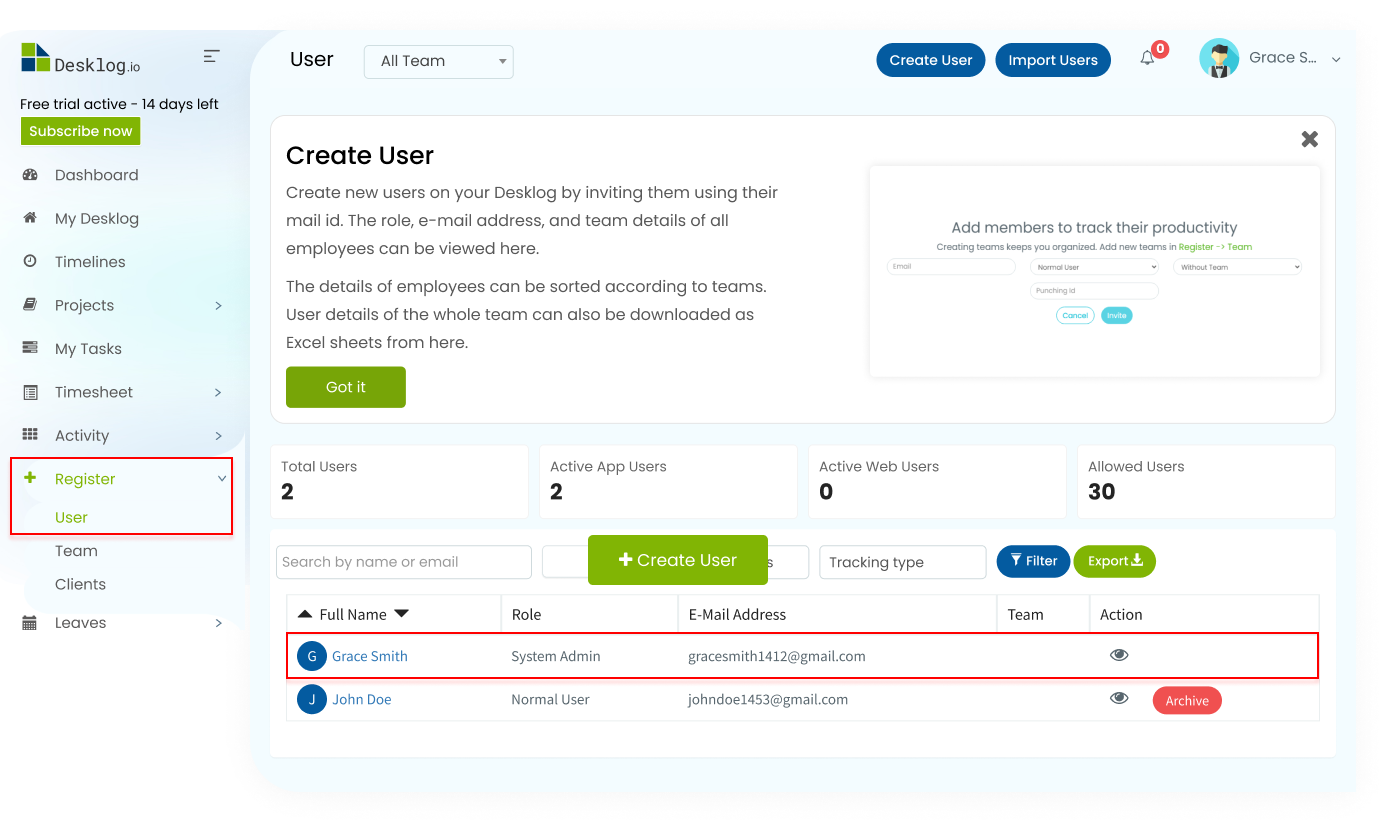
Step 1:
Go to the Desklog dashboard. Click on Register from the side menu, and Select User. Choose the User you’d like to integrate with Jira.
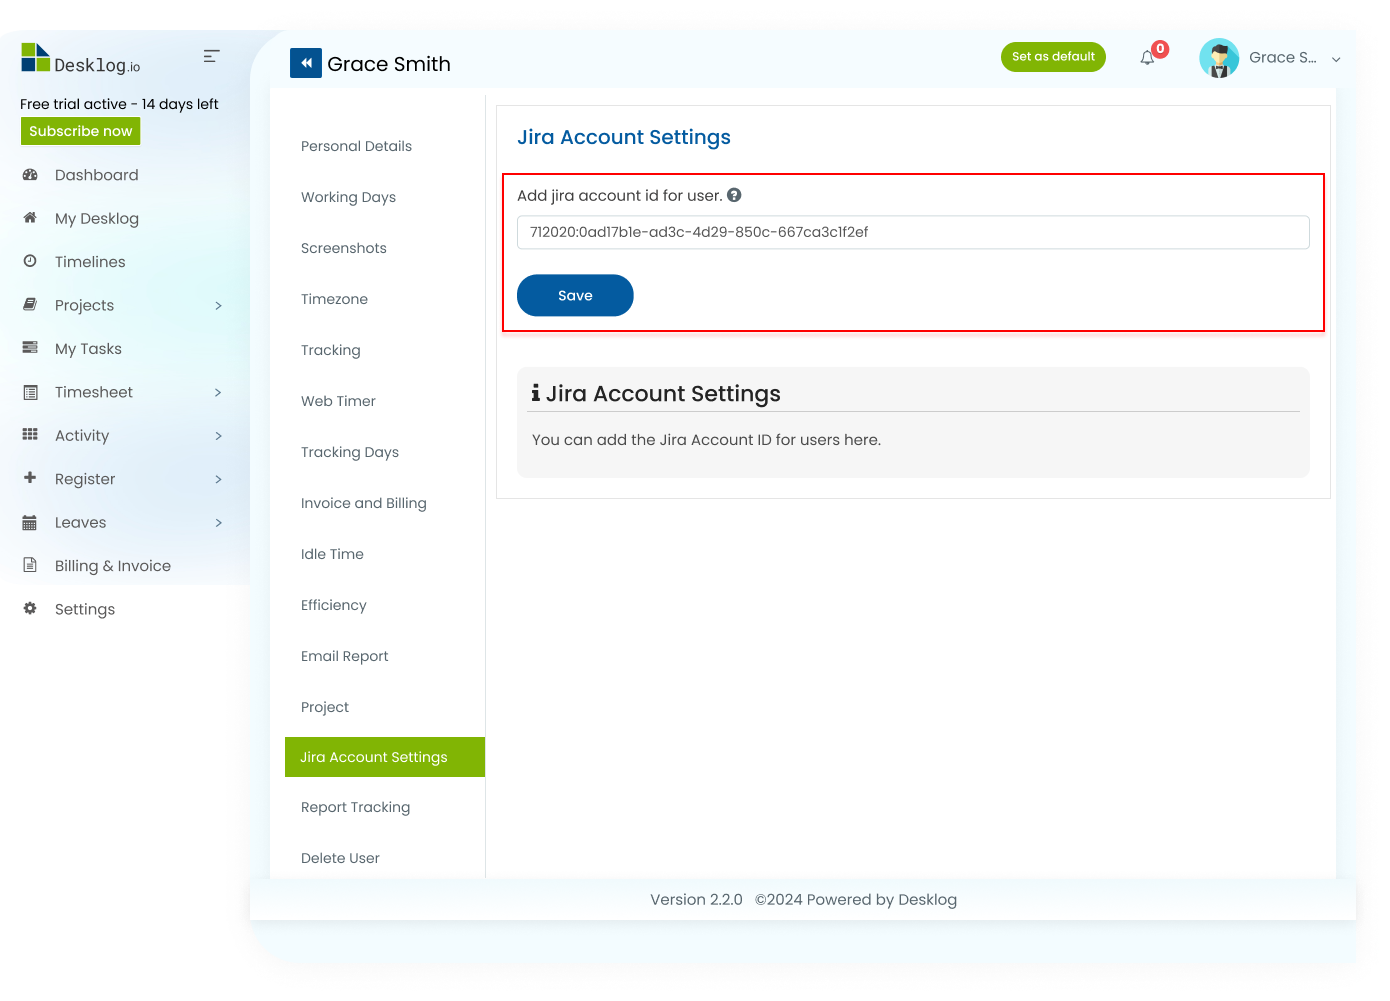
Step 2:
From their account, go to their Jira Account Settings. Paste the Jira Account ID and Click on Save.
Step 3:
Your user has now been successfully integrated with Desklog.
Now Desklog has been successfully integrated with Jira. Any change that you made in Jira will reflect in Desklog, including user assigning, task status updation, and so on.
That’s how Desklog’s Jira integration works. If you have any doubts or queries, contact our support team, or mail your inquiries to support@desklog.io.