How Desklog’s Leave Management Works?
The functionality of leave management in Desklog is based on how the leave settings are configured. The Leaves section includes four main sub-menus: Calendar, Approval, Report, and Configuration. While these are primarily accessible to Admins, access may vary based on the role-based permissions assigned to each user. Regular users have view-only access to their own leave data and can apply for leave through the calendar interface provided to them.
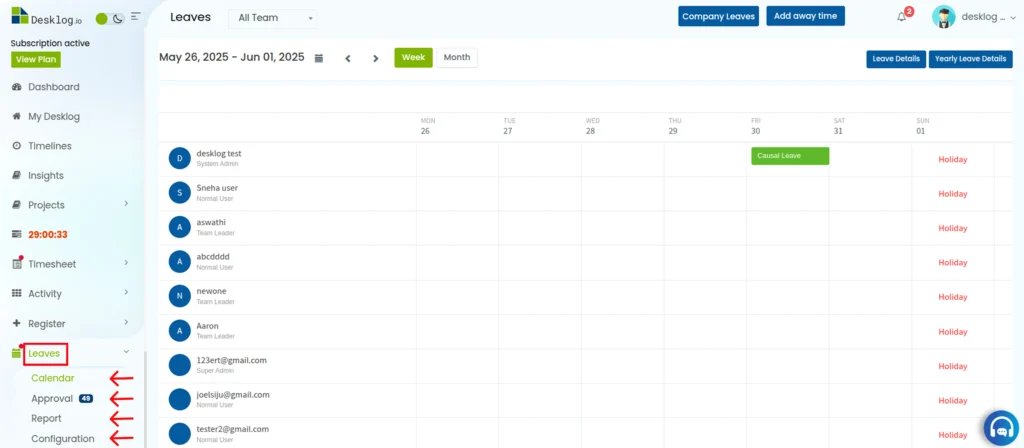
1. Calendar
The Calendar lets you:
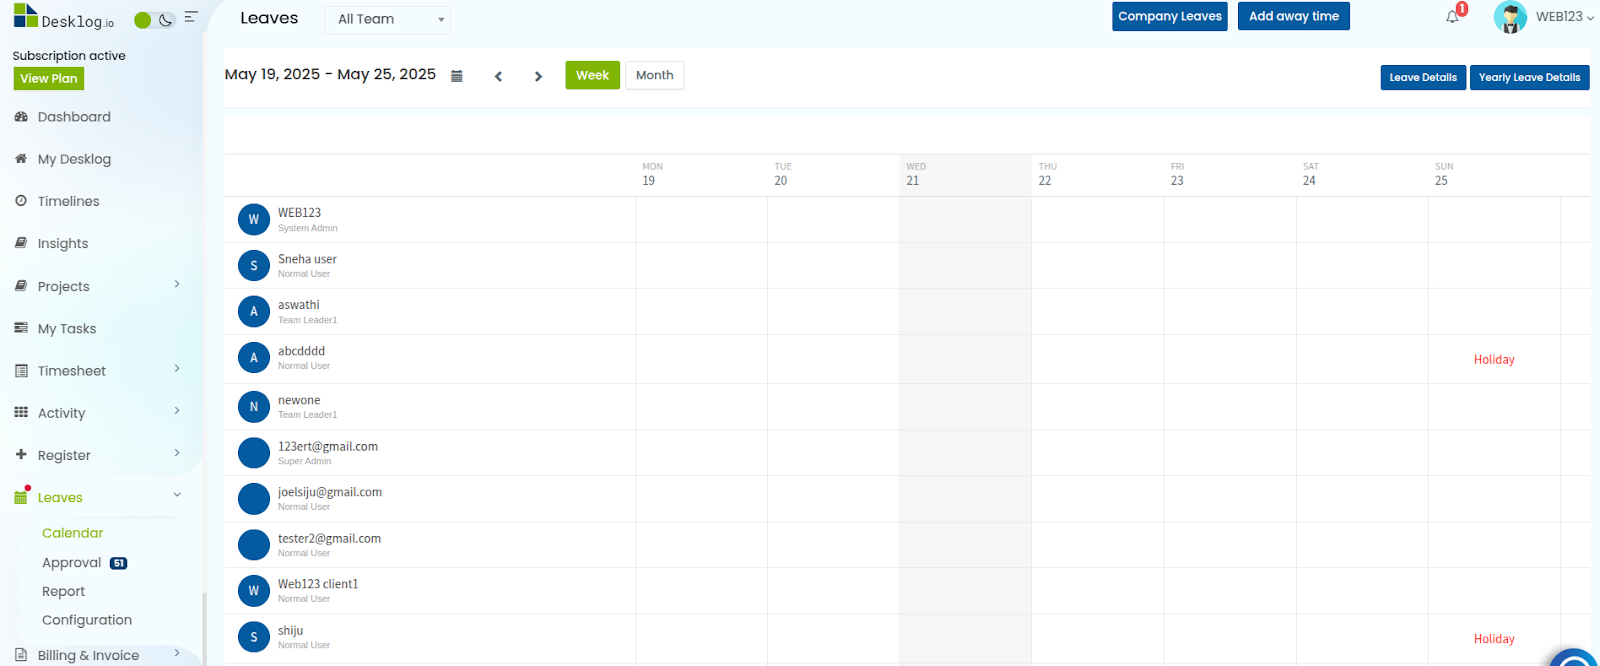
- View company leaves at a single glance.
- Add away time for the admin, team or to any specific employee, using the same option admin can apply for special leave.
- View your own monthly/yearly leave details for easier review.
- View team wise monthly/yearly leave details like Leaves Taken, Leaves Pending and Available Carry using the filter option on the left right corner.
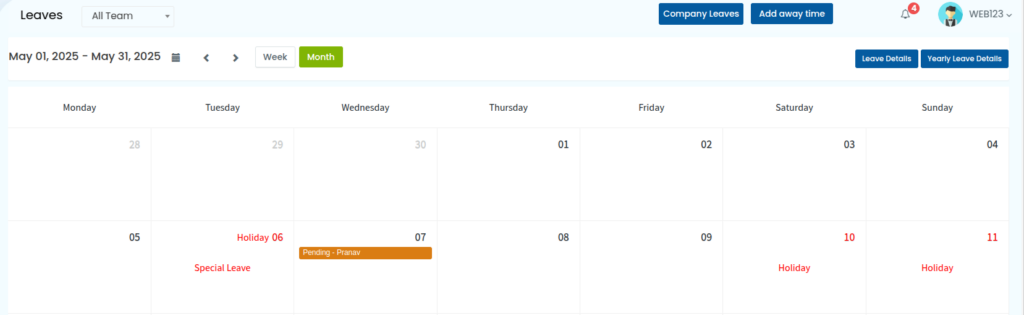
The above-mentioned data is part of the Admin Leave Dashboard. In addition to this, admins can view individual leave details directly from the calendar’s date tiles, which update in real time as users apply for leave.
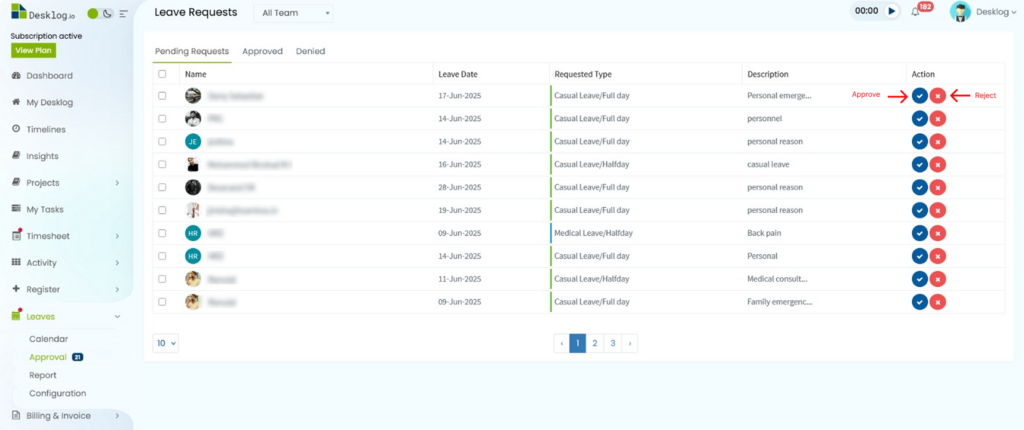
2. Approval
Leave approval, a key function in Leave Management, is exclusively available to Admins. Through the Approval option under the Leaves section, Admins can efficiently review, approve or reject leave requests submitted by employees, ensuring smooth and controlled leave processing.
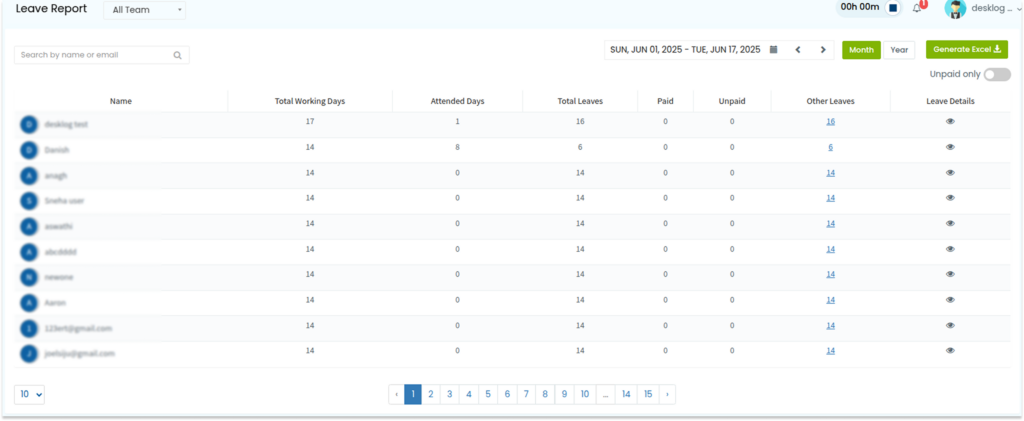
3. Report
Using the Reports section under the Leaves option, you can access complete Monthly or Yearly leave reports for all users, including attendance records, leave summaries, and other key details; along with the ability to export the data to Excel for convenient tracking and analysis.
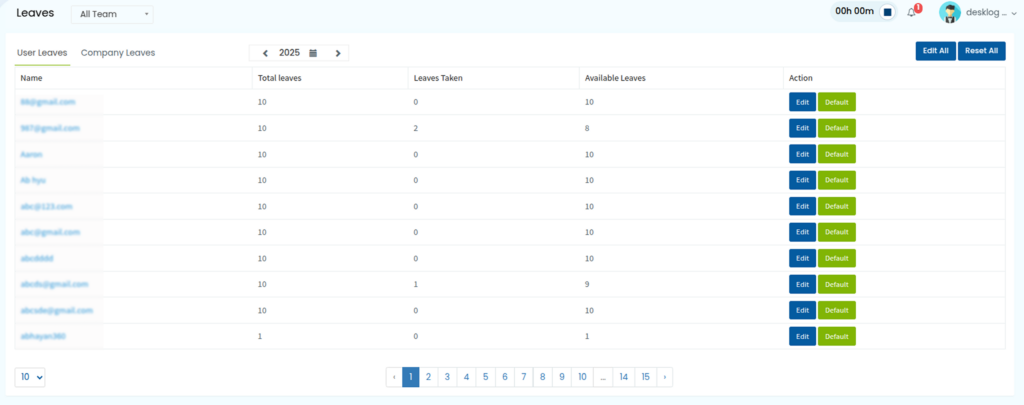
4. Configuration
Leave configuration allows you to view and manage each user’s leave details; such as total allotted leaves, leaves taken, and available balance, with the option to edit or reset leave counts as needed for accurate tracking and allocation.